Showing posts with label Before and Afters. Show all posts

29.5.13

copy cat dresser

Jed and I refinished this rose dresser a few months back and I just loved how it turned out so I decided to copy it. It's not the exact same color, but fairly similar. We purchased this dresser from craigslist... of course. It was solid wood (which is a must) and all the drawers were dove tailed and the tracks worked good. All of which is what we look for when finding furniture to refinish. If it doesn't have those qualities its most likely not worth the effort of fixing it up.

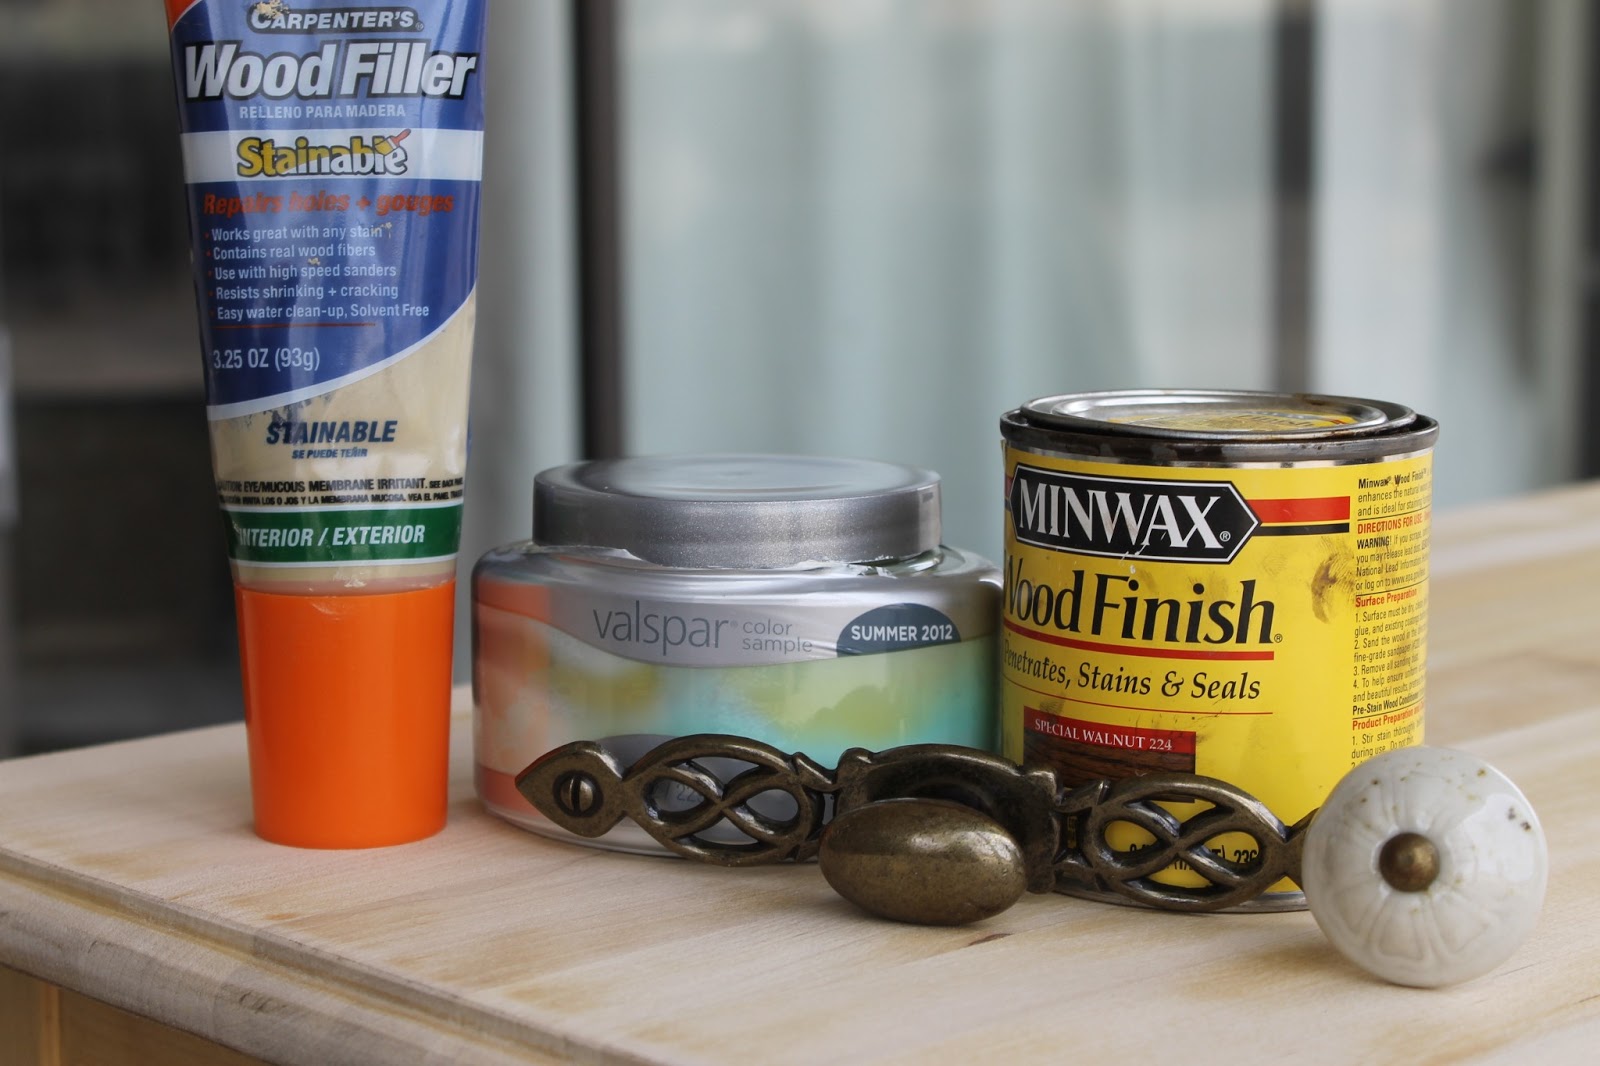
It was a pretty straight forward project of sanding, staining, priming, and painting. We did redrill the holes for the knobs to fit the antique finished pulls that I scored for $2 from hobby lobby.
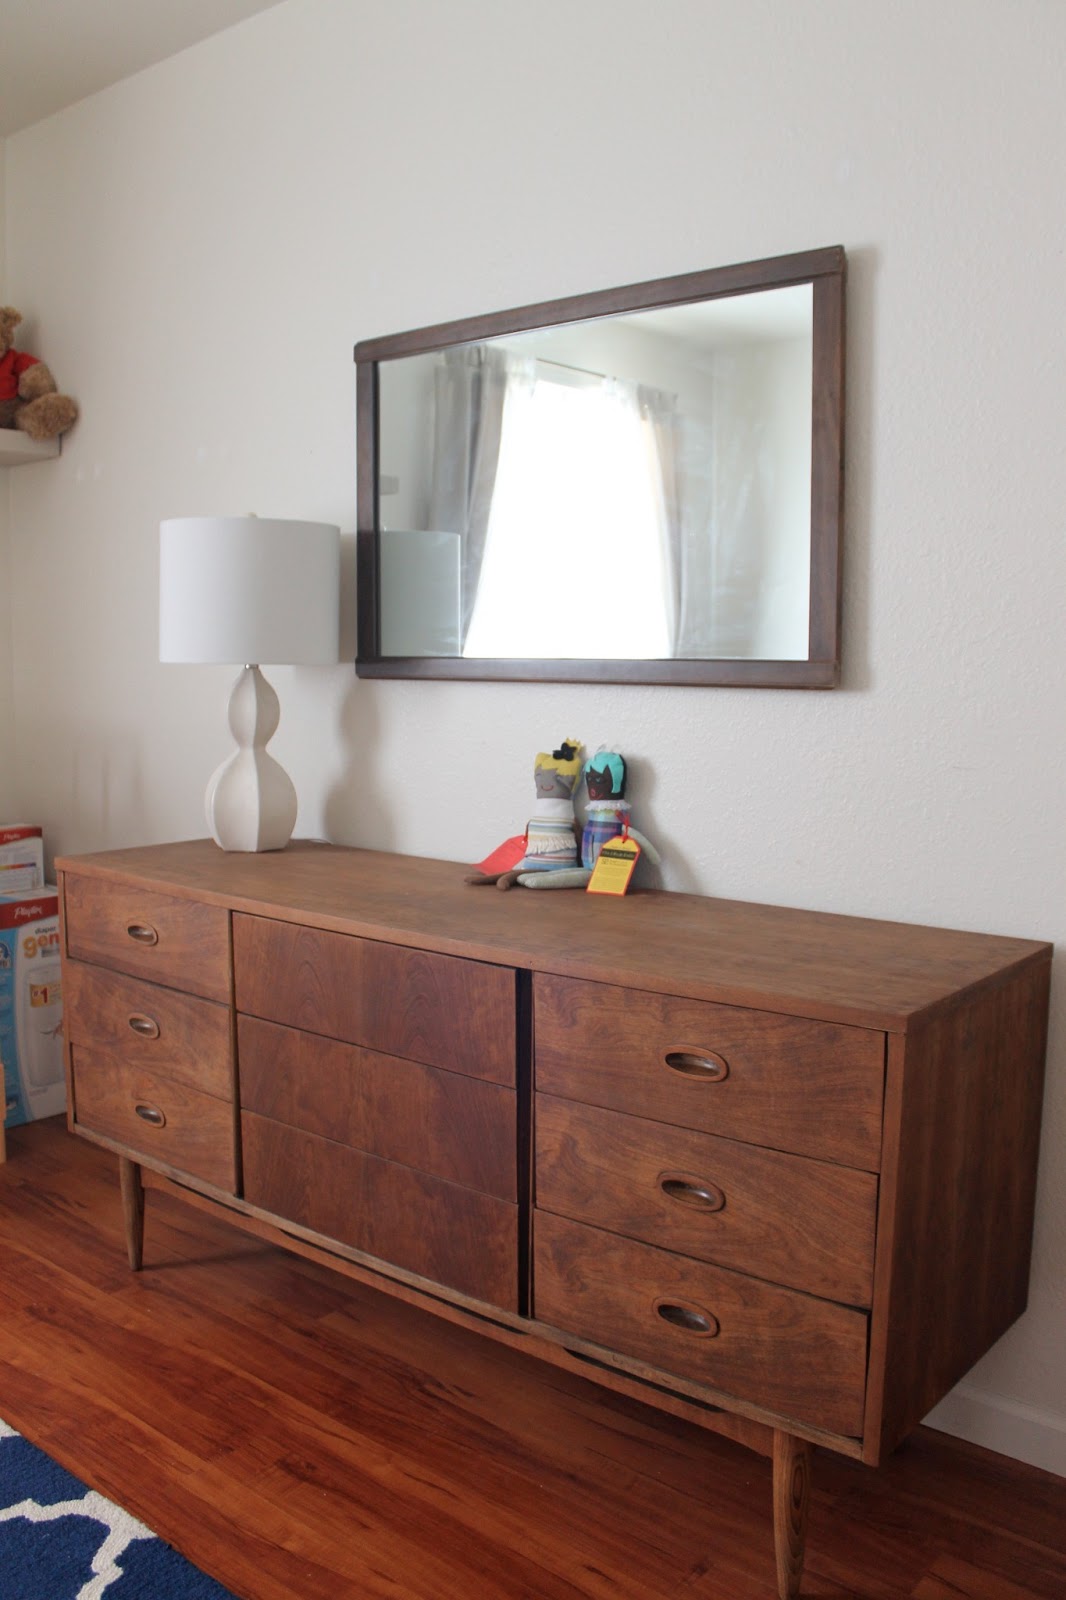
dresser before


dresser: $30 (Craigslist)
paint: $3 (Valspar--Lowes)
wood filler: on hand
knobs: $12--Hobby Lobby
total: $45
SOLD

funny story... we ended up selling this dresser to a family that we go to church with, but had no idea it was them until they showed up at our house! 

10.4.13

baby room + dresser

We finished this dresser months ago, and when no one wanted to buy it off Craigslist I decided to keep it for myself! I love the look and the caster wheels give it so much character. So we held on to it with the idea of using it in the baby's room after we found out that I was pregnant.

When Angie moved out and we started to put the babies room together, I started to have second thoughts on the dresser. Which is no surprise, I have the hardest time committing to anything lately. I am such an indecisive person, but add in pregnancy hormones and its nearly impossible to make any type of decision with any lasting commitment. annoying. 

I went on the hunt for another dresser and Craigslist totally pulled through for me! I found the exact style I was looking for, in our price range, and the family selling it lived 5 minutes away! Talk about seriously lucking out.

I of course forgot to take any before pictures of the dresser in all of its polyurethane glory. Jed snapped these on his iPhone while he was working on it. 

Jed was totally impressive and spent his entire Saturday sanding it down and then we stained it together that night. So in practically one afternoon Jed transformed it from a beat up old thing to the perfect dresser for little miss. Pretty great guy.


Dresser: $50 (Craigslist)
Stain: $4.50 (mini wax color special walnut  via Lowes)
Stripper: on hand
Sanding supplies: on hand

Total: $54.50


As for the first dresser we ended up selling it the next weekend to my mother in law! It goes perfectly in her guest bedroom and made it way easier to part with knowing that she liked it so much!


4.1.13

buffet love

 I scored this awesome buffet table off of Craigslist a couple months ago. Craigslist had been pretty bare the last few months, but when I saw this beauty for only $40 I sent Jed straight over to pick it up.

It had really think layers of paint and even after sanding it down we never found the true wood grain. I chose a bolder Coral color by Valspar and antique rusted knobs from Hobby Lobby.

 
Aren't these legs awesome?
We weren't quite finished with this when my sister, mom, and I decided to do our first craft fair. We decided the buffet was a great addition to our booth so I had Jed and my dad haul it over and we used it to display some of our products.

At the craft fair I met such a nice lady selling Rice Doll's from Belize. I ended up buying two doll's and she ended up buying my buffet table. She had to convince her husband a little because the color was a little 'girly' in his mind. But in the end she went home happy with a new piece of furniture and I went home with a little more cash.

I really didn't think that it would sell at the craft fair so I didn't take any pictures of it before we left. Which kinda annoys me because now I only have these grainy cell phone snapshots that my sister and I took. 
buffet: $40 (Craigslist)
paint/primer: $16(Valspar via Lowes)
wood filler: on hand
knobs: $21 via Hobby Lobby
total: $77

19.11.12

Rut

I've been in a rut lately.. for a lot of reasons, but mostly for lack of motivation. Jed and I live in such a small apartment that redoing furniture sometimes becomes more on an inconvenience then actually fun. When we get a new piece of furniture it kinda turns our apartment upside down until its finished and sold.

But we have started up again and are working on a new piece that I love and and am trying to convince Jed that we need.. he's not buying it.

But before that I wanted to show off a Mid-Century Modern Dresser and Nightstand that we redid a couple of months ago. I love this style and wish I had more of it in my own home.


Apparently I am super lazy and didn't take before pictures... or during, because I can't find any. I do know that the stain is Natural Oak by Miniwax and the drawer fronts are painted with Olympic Pegsus White

20.8.12

Updated Living Room

I'm a little embarrassed to post my before pictures of my living room. They aren't even the original pictures... they are more like half way before pictures. At this stage I had already painted the wide horizontal stripes (tutorial here) to try and hide the humongous blank wall taking over our living room. In hindsight I think the stripes made the wall look even bigger and blanker.


The room started to come together when I scored this awesome buffet and turned it into our current entertainment center. After that I was given (which means they were FREE!!) book cases, and decided to try for a more built in entertainment center look.

The book cases were sturdy and solid, but not quite the right color or look I was going for.

I painted them the same color as the buffet/entertainment center and then wall papered the backs with an ivory damask Allen Roth design that I purchased from Lowes. This was my first time working with wall paper and I loved it. It gave them great texture and dimension.


I love the way it came together and how it gives my big blank wall character. It has also bee a blast organizing all my books and knick knacks to put them on display!

Linked:
sumos sweet stuff 

30.7.12

Rose Dresser

This is another dresser I found on, of course, Craigslist. I love craigslist post without pictures attached.. its like a game to me. I always can't wait for the owner to email/text me a picture of there secret treasure. This is one that didn't have an original picture but as soon as I saw it I knew I wanted it. 

1. We gave the whole thing a good sanding (we started to sand it before I took a picture.. but to begin with the top was painted).

2. We decided to stain the top because two toned dressers are my favorite so why not? 
-We used Miniwax Pre-Stain Wood Conditioner 
-And stained Miniwax Provincial color

3. We chose Benjamin Moore Covington Blue (which we also used on this dresser here...

4. We ended up purchasing new knobs for the dresser at Hobby Lobby during there extra 50% off sale. The 'before' knobs were so strange... metallic arrow heads? not what we were wanting!

After about 3 coats of paint and stain it was ready. We posted it on Craigslist and had it sold within 4 days to a sweet young girl that just move to NM... I hope she likes it as much as I did!
Linked:

 Monday

23.7.12

Caster Wheeled Dresser

We currently have four dressers, one night stand, a kitchen table, six chairs, and an armorie taking over our dinning room. It feels beyond cluttered and looks a little overwhelming. We finally finished two dressers this past weekend so hopefully some of it will be gone soon so that we can get back to a somewhat normal house.

This dresser was a monster. We bought it off of Craigslist from a strange woman that felt the need to tell us every detail of her life... strange. It was originally lime green sponge painted, with globs of extra paint everywhere, with chipped veneer coming off all over. I thought I loved the dresser enough that all the work would be worth it, but once we got it home I was so overwhelmed we just stared at it for about three weeks. 

We Jed finally broke down and decided that we better start. 
1. He started by wood putting all the areas that were missing veneer and letting it dry overnight.
2. He then sanded the dresser about 7 times to get the paint even. 
2. While doing that he realized the top of the dresser was loose, so we wood glued and clamped it back together.
4. We painted the dresser with Annie Sloan Antique White chalk paint. It was my first time using Annie Sloan's paint and was so excited to try it out. I personally think I need A LOT more practice using it, but initially am very  please with the turnout. I love the texture it gave the dresser and the matted look. Because this dresser was in such bad shape we ended up having to give it three coats of paint.

5. We were able to use the existing hardware, which I think gives it a great antique look to go along with the original caster wheels.

Linked:

2.7.12

Mid Centruy Dresser Redo

A few weeks ago I scored this great mid century modern dresser for a steal! I fell in love with it instantly and wanted to keep if for myself, but realized when I was finished that there was no room in our small apartment. I posted it on Craigslist and within 12hrs it had sold to a lovely lady.

These are the before pictures.. The front of the dresser doesn't look too bad but when looking at it closer it needed a lot of work. There were chips in the veneer and lots of discoloration.
 
You can obviously tell the top of it needed the most work.

This is the first time Jed and I tried to sand/strip/and re-stain a veneer. We were pretty nervous because we didn't want to go through the veener, but we were lucky and this dresser was made solid with a thick veneer.

Step #1: We used a stripping agent over the entire dresser and scraped off a think layer of the existing stain and polyurethane.


step #2: Sand the heck out of the dresser. Jed was covered in so much dust after this, but the result was exactly what we wanted.
Step #3:  For the first time we used a 'pre-stain' wood condition to treat the wood before we stained it. I actually loved the color of the wood after just the wood conditioner. It really brought the natural color of the wood and grains out.


Step #4: Because the veneer did not match completely throughout the dresser we went ahead and stained the dresser to get all the woods to match. We use Minwax 'natural oak'.


Step #5: I decided that I wanted to try a two toned dresser and went ahead and primed then painted the drawer fronts a bright white. I love the look, but also like the look of an all natural dresser.

Like I said I sold this dresser to the nicest lady ever. She was so trendy and cute. We got to talking and she told me she was a photographer and gave me her website. After a thorough stalking I fell in love with her work and hope one day she can take pictures of Jed and I!

Linked: